A year ago we moved into a house built in 1892 and knew essentially nothing about what that meant. We'd done research. We'd talked to a historic home inspector. We'd read the disclosures carefully. We thought we understood what we were getting into. We were wrong in ways that were sometimes expensive and sometimes delightful, and occasionally both at the same time.
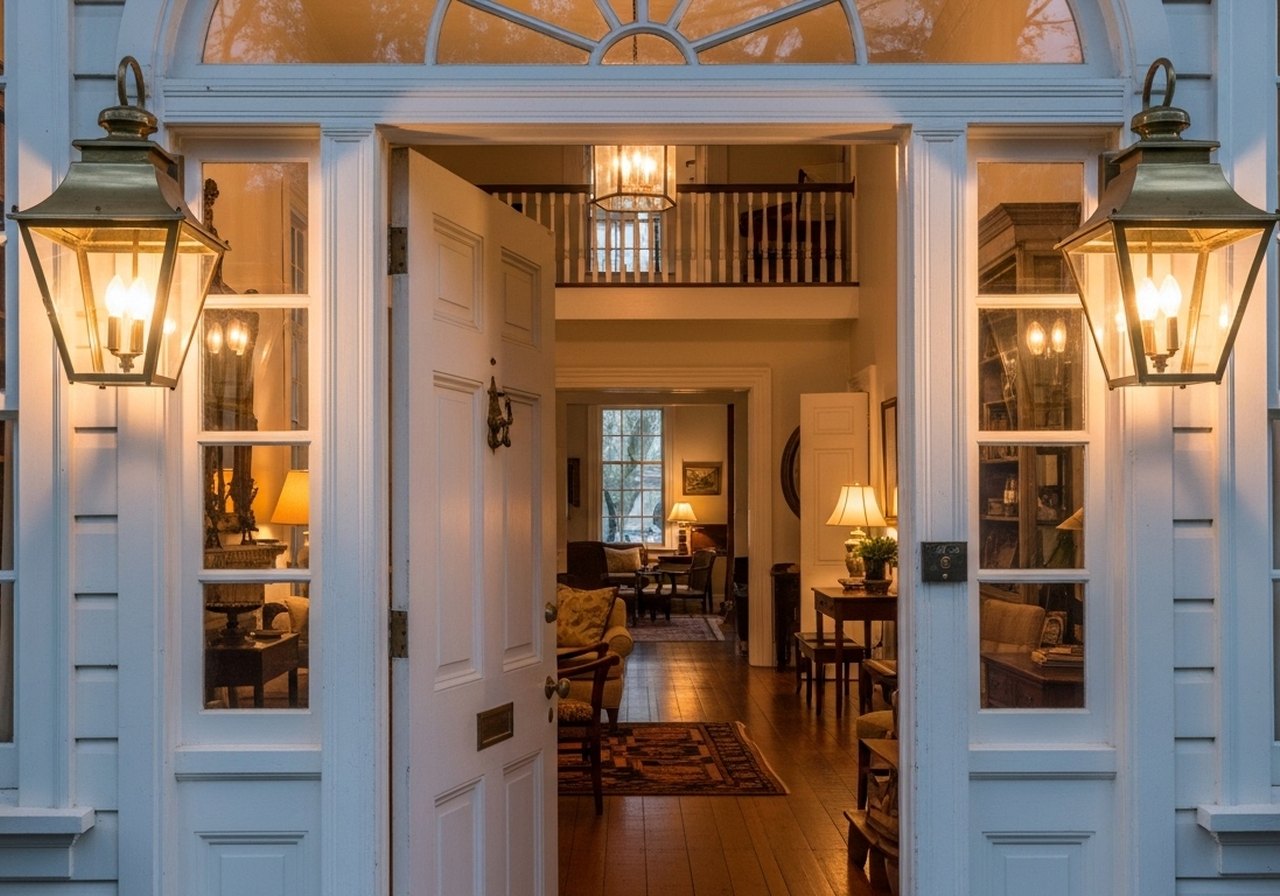
This is the post I wish I'd found before we bought our historic home in Charleston's Wagener Terrace neighborhood, an honest accounting of what the first year taught us, what we'd do differently in the purchase process. And what nobody tells you about actually living in a 130-year-old house. If you're considering buying a historic home, or just signed papers on one and are now wondering what comes next, this is for you.
The Inspection Process for a Historic Home Is Completely Different
A standard home inspection is designed for a house with PVC plumbing, romex electrical, and a 20-year-old roof. It uses a checklist that was written assuming certain systems are in certain places and in certain conditions. In a house built in 1892 in Charleston, some of those systems were upgraded once in 1958 and once in 1984 and haven't been touched since. The checklist doesn't really apply.
We hired a general inspector, which was required by our lender. We also hired two additional specialists: a structural engineer to assess the foundation and the load-bearing elements. And a historic building specialist who consults specifically on pre-1920 construction in the Lowcountry. The structural engineer cost $800. The historic building specialist cost $600. Both were worth many times what we paid for them.
The structural engineer found that the brick foundation piers. The original construction, approximately 8 inches square and about 4 feet tall, sitting directly on the soil, had settled differentially over 130 years. Three of them had settled more than the others, causing a slight slope in the first-floor subfloor. Not a structural emergency, but something to monitor and, eventually, to address. He also found that the sistering that had been done to several floor joists in the 1950s was done correctly and was still solid.
The historic building specialist found the knob-and-tube wiring in the attic that the general inspector had noted but not fully characterized. The K&T was not active. It had been disconnected and replaced. But about 40 linear feet of it was still in place and insulated with blown cellulose that had been blown over it in a 1990s energy audit. Blown insulation on old knob-and-tube is a fire risk, even when the wiring is disconnected, because it traps heat in a system that wasn't designed to be insulated. The remediation, removing the insulation and the remaining K&T, cost us $2,200 eight months after we moved in, when we did our attic work.
Get the specialists. The general inspector will not catch everything a specialist will catch, and in a historic home, the specialist-level details are often the most consequential ones.
What the Charleston Historic District Review Board Means for Your Renovation
Our house is in a locally designated historic district, which means certain exterior changes require review and approval from the city's Board of Architectural Review. This applies to: changes to the exterior materials, window and door replacements, additions, new fences, and alterations to the piazza. It does not apply to interior work, routine maintenance using like-for-like materials, or paint colors (the BAR does not regulate paint in Charleston, which surprises people).
In practice, the review process is not as burdensome as it sounds if you're working within the guidelines. We submitted one application for the exterior work we wanted to do, repointing the brick on the foundation, replacing three deteriorated exterior window units. And adding a gate at the property line. And it was approved in a single meeting with minor modifications. The process took about six weeks from application to approval. The BAR staff are genuinely helpful and will pre-screen your plans informally before you submit formally, which is the right way to approach it.
What the BAR does require is that you use period-appropriate materials. You cannot replace original wood windows with vinyl in a locally designated historic district in Charleston. You cannot paint brick that was originally unpainted. These restrictions are why the neighborhood looks the way it does, and they protect your own property value at the same time they limit your options. I've come to appreciate them, though I confess I didn't feel that way during the six weeks of waiting.
The First Six Months: Surprises and Their Costs
In the first six months of owning our house, we spent $21,400 on things that were not part of our planned renovation budget. Here's the list:
- $2,200, Attic remediation (insulation removal and K&T removal, as described above)
- $4,800, HVAC replacement. The two-zone system that served the house was original to a 1995 installation. One zone failed in August. The first August, in Charleston, with no air conditioning. And the second zone was on its last legs. We replaced both zones rather than repair one, which was the right decision.
- $1,900, Plumbing: two active slow leaks in the supply lines under the house, found during a routine annual inspection by a plumber we hired specifically to walk the crawl space and report on the plumbing condition. Both were at compression fittings that had been in place since the 1970s. Both were easy repairs once found; the difficult part was finding them.
- $3,600, Exterior painting on the piazza railing and the front door surround. The existing paint was failing, lead paint in several layers. And had to be stripped and refinished by a contractor certified to handle lead paint remediation.
- $2,400, Window repairs on four windows that had lost their glazing compound and had broken sash cords. These were original wood windows in good structural condition; the repairs preserved them rather than replacing them, which was both the right historic preservation choice and the more cost-effective one (replacement would have been $3,500+ per window in the historic district).
- $6,500, Roof. The asphalt shingle roof had been replaced in 2005, per the seller's disclosure. What the disclosure didn't mention was that the 2005 replacement had been done over the original tin roof rather than removing it, adding weight to the roof structure. And the asphalt shingles were now showing their age at the edges and valleys. We had the roof fully stripped and re-roofed in November, which was better timing than a Charleston summer emergency.
None of these items were the renovation we'd planned. All of them were necessary. The lesson I take from this is not that we bought the wrong house. The house is right. But that the standard advice to budget 1% of purchase price per year for maintenance significantly underestimates what a historic home requires in the early years. In our experience, budget 2–3% for the first five years, then reassess.
What We Got Right in the Purchase Process
We negotiated a significant price reduction based on the specialist inspection findings. The original offer price was accepted; after the inspection, we went back with a specific list of deferred maintenance items with estimated remediation costs. And negotiated $22,000 off the price. This required documentation, actual contractor estimates, not general statements. And a seller who was motivated. Not every situation allows for this. But having the specialists gave us specificity that made the negotiation credible.
We also got a lead paint disclosure and inspection before closing, which in a house of this age is both legally required and practically important. Charleston homes built before 1978 are very likely to have lead paint; homes built before 1940 almost certainly do. The lead paint in our house is not a current risk. It's well-encapsulated under layers of later paint on surfaces that aren't being disturbed. But knowing where it is and in what condition changed how we approached the exterior work and the interior plaster repairs we've done.
And we joined the Preservation Society of Charleston immediately after closing. The membership costs $50/year. The access it gives you, to contractor referrals, to the historic building library, to members who have dealt with the exact same problems in the exact same type of house, is worth far more than that. When our plaster cracked on the parlor ceiling and we didn't know whether it was settling or active movement, I posted in the member forum and had three responses within 24 hours from people who had dealt with identical situations in 1890s-era Charleston single houses. One of them recommended the plaster specialist who did our repairs.
Living with a Historic Home: What Becomes Normal
After a year, here are the things that have become part of our normal life that we didn't anticipate before we bought:
The floors move. Old wood floors in a Charleston single house on pier foundations expand and contract with the humidity seasons. In summer, the floors are tight against each other. The humidity swells them. In winter dry spells, gaps appear between boards. This is normal and expected behavior for a floor of this type. If you're walking through and hear a creak that wasn't there last month, it may just be the season changing.
The plumbing is slow. Our original cast iron drain lines move slowly, not because they're blocked but because cast iron accumulates mineral scale over 130 years. We have it professionally cleaned every two years with a hydrojetting service. In the meantime, we've learned which sinks drain slowly and what that means about the nearby cleanout access points.
The house knows about weather before we do. When a major system is coming, certain doors that were easy to open yesterday start to stick today. The humidity is changing the wood frames faster than the weather forecast is telling us about it. We've become surprisingly good weather predictors from the behavior of our interior doors.
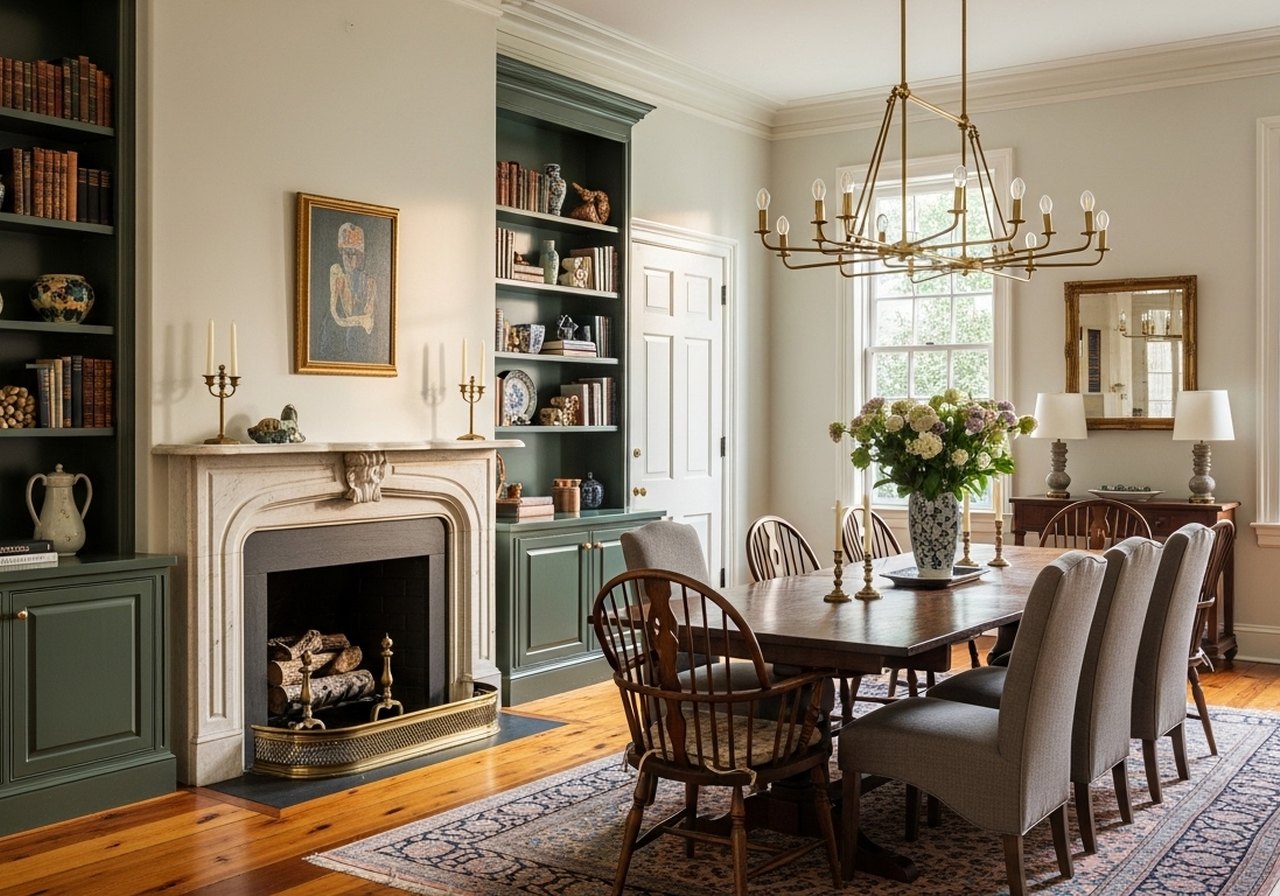
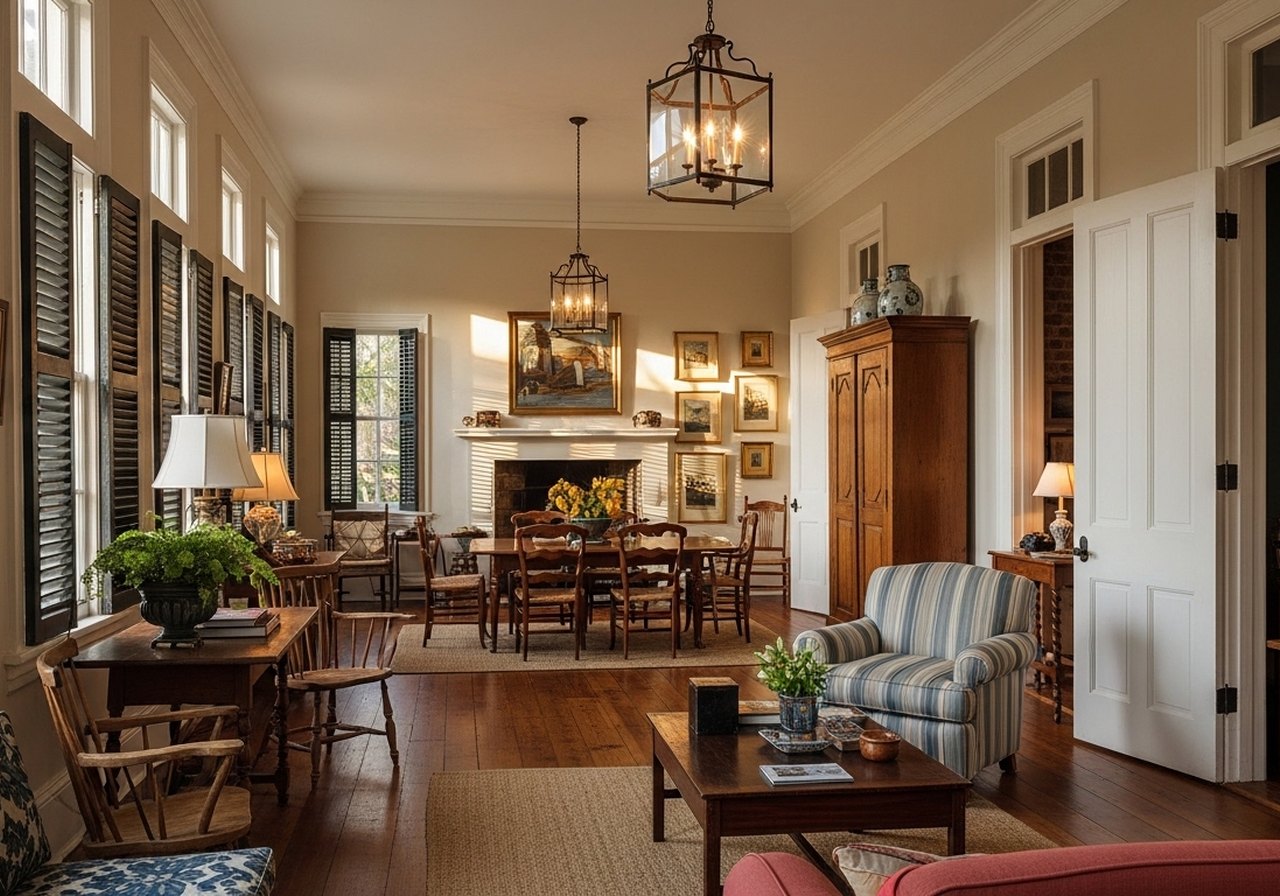
The light is extraordinary and changes constantly. One of the things we didn't fully appreciate when we bought the house is how the tall windows and the piazza change the light inside throughout the day and through the seasons. In winter, the low sun angle sends light across the heart pine floors in long horizontal bars. In summer, the piazza overhang blocks the direct midday sun from the south-facing rooms while letting in the morning and evening light from the east and west windows. The house was designed to work with light, and it does.
The Renovation: Where We Started and Where We Are Now
Our formal renovation. The planned, contracted work, started four months after we moved in. In that order: floors first (see our heart pine floor refinishing guide), then the kitchen (see our kitchen renovation post), then electrical and lighting planning throughout the house. The lighting plan is the thing I'm most glad we got right early, if you haven't read my post on starting with lighting, that's the best summary of what we learned about renovating a historic home.
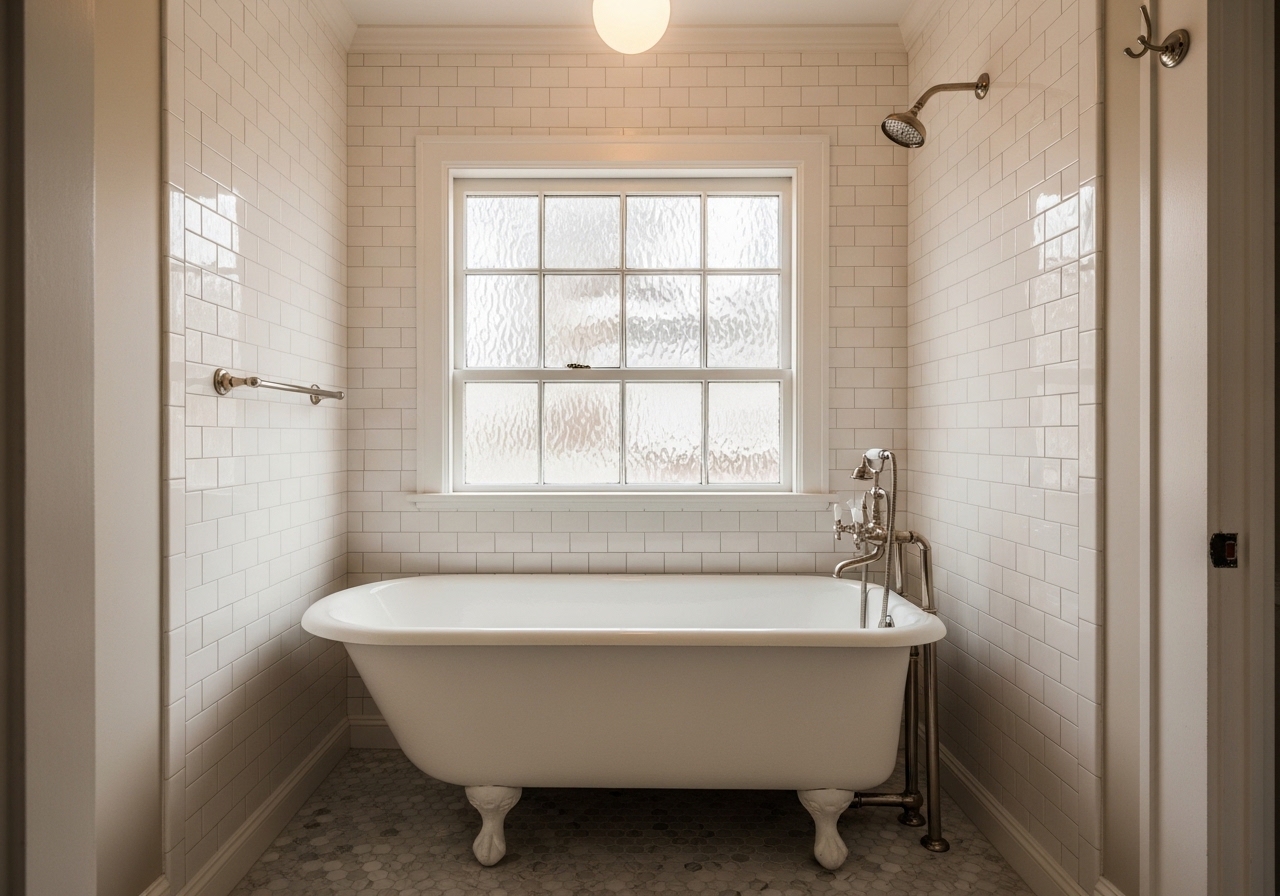
We're not done. Historic homes are not finished. There are always things to address, to restore, to decide about. The bathroom with the original clawfoot tub, see that bathroom renovation post, was one of our best projects of the year. The parlor restoration is next. The upstairs hallway wallpaper is a future project we're still deciding on.
The honest truth about buying a historic home, one year in: it is more expensive, more demanding, and more complicated than buying a new house. It is also more interesting, more alive, and more connected to something real than any new house we looked at. The house has a history that predates us by 130 years and will outlast us by another 130 if it's well maintained. That context changes how you make decisions about it. You stop thinking about what you want and start thinking about what the house needs and deserves. That's a different relationship to a place than most people have, and it's one we didn't fully understand until we were living it.
Related posts on this site: See refinishing heart pine floors, the full kitchen renovation, the clawfoot tub bathroom, and why we always say to start with the lighting.
Quick Answers
What inspections do you need when buying a historic home?
At minimum: a standard home inspection, a structural engineer, and a historic building specialist who knows pre-1940 construction. The general inspector will catch obvious issues; the specialists will find the things that matter most, differential foundation settlement, active K&T wiring, lead paint conditions, original plumbing material and condition. Budget $1,500–$2,000 for all three. It's the best money you'll spend in the purchase process.
How much should you budget for maintenance on a historic home?
The standard advice, 1% of purchase price per year, significantly underestimates historic home maintenance, especially in the first five years. Budget 2–3% of purchase price annually for the first five years as you discover and address deferred maintenance. After that, if you've done your initial work, 1.5% is more realistic. Also keep 15–20% of any planned renovation budget as a contingency for what you find inside the walls.
What are historic district restrictions in Charleston?
Exterior changes in Charleston's locally designated historic districts require review by the Board of Architectural Review. This covers material changes, window and door replacements, additions, and fences. It does not cover paint color, interior work, or like-for-like maintenance repairs. The process typically takes 4–8 weeks and the BAR staff will pre-screen your plans informally. Working within the guidelines is manageable; trying to work around them is not.
If I had to prioritize one thing for year one: tackle the lighting first. BO-HA's lighting collection was our starting point, broad enough to compare styles without getting lost.
If you're at the beginning, the post I'd read first is our guide to starting a renovation with lighting. It's the single thing I'd do differently in year one.
Expect the Surprises
The biggest lesson of year one was that charming surfaces hide real work, old wiring, plaster, plumbing, windows. And that everything in an old house is interconnected. Touch one system and you often uncover another. Budgeting time and money for the unexpected kept the surprises from becoming crises.
Where We Spent First
We addressed safety and the building envelope before anything cosmetic, then used lighting as our first satisfying win, warm bulbs, a dimmer, and a few sconces transformed how rooms felt while the bigger projects waited. Room by room, not all at once, is what kept it sane.
Shop this post: lighting collection